Tag: cyberchef
Hack The Box – Keep Tryin’ (Forensics Challenge)
This packet capture seems to show some suspicious traffic.
All that is provided for this challenge is a small PCAP, and the observation that it contains “some suspicious traffic”. Let’s go!
Opening the PCAP in Wireshark we find that it only contains 26 packets.

The first thing my eye was drawn to was the DNS traffic. The use of TXT records with long, seemingly random hostnames looks a lot like DNS tunnelling, but let’s see what else we have.

Looking through the PCAP we find that Packet 10 contains a HTTP POST request to a resource named /flag. Following the HTTP Stream (tcp.stream eq 0) shows the following text:
TryHarder

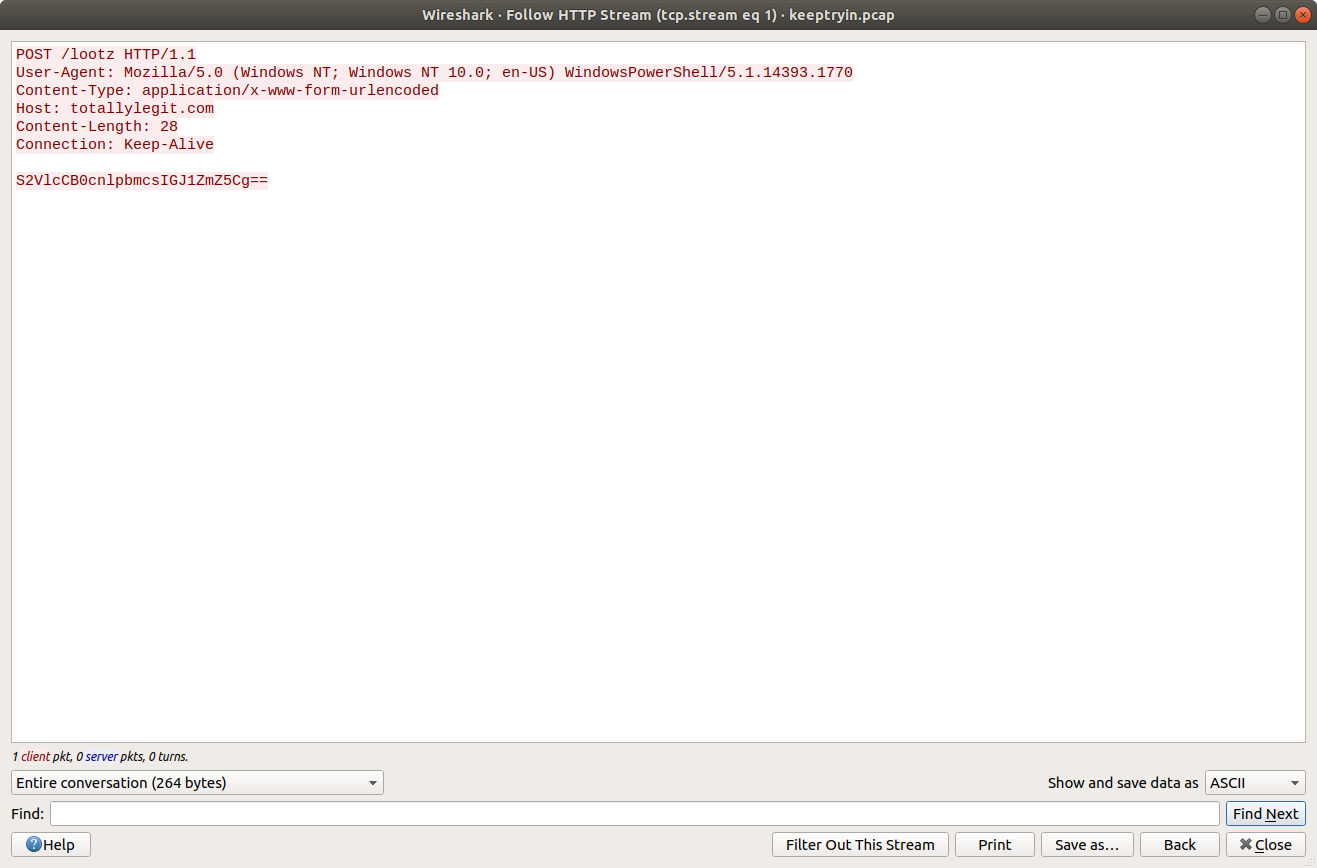
Similarly, in Packet 21 we find another HTTP POST request to a resource /lootz.

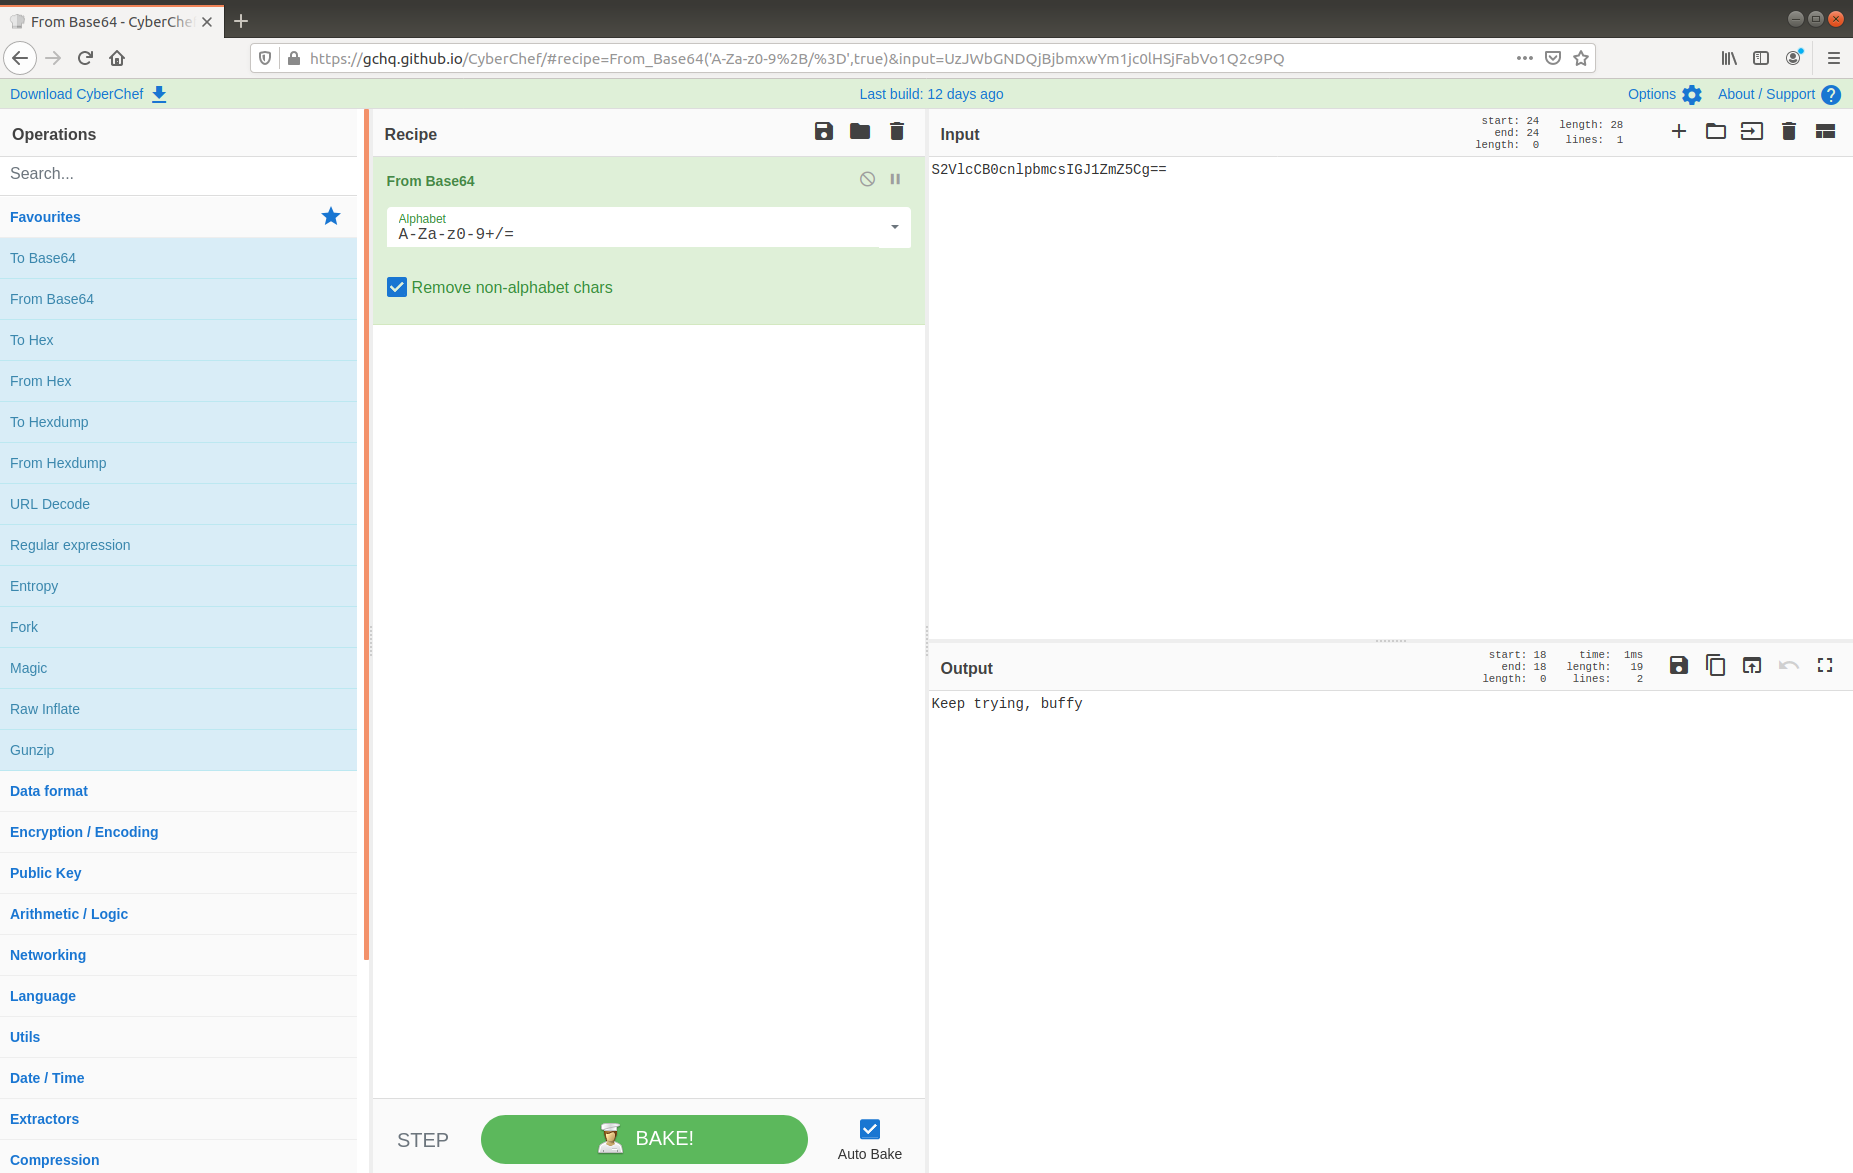
Following the HTTP Stream (tcp.stream eq 1) give us what appears to be base64 encoded text.
S2VlcCB0cnlpbmcsIGJ1ZmZ5Cg==
Decoding with CyberChef gives us the following:
Keep trying, buffy
Neither of these have any immediately obvious use, so let’s go back to the DNS traffic and take a closer look.
dns

The first DNS request is for the following TXT record:
init.c2VjcmV0LnR4dHwx.totallylegit.com
We can drop the first part of the hostname (init) and the domain (totallylegit[.]com), leaving us with a seemingly random string. From the character set we could be dealing with more base64, however as the standard base64 character set is not safe for use within URLs, we will have to specify the base64url decoding instead. Fortunately CyberChef makes this trivial by offering multiple Alphabets as an option in the From Base64 operation.
c2VjcmV0LnR4dHwx
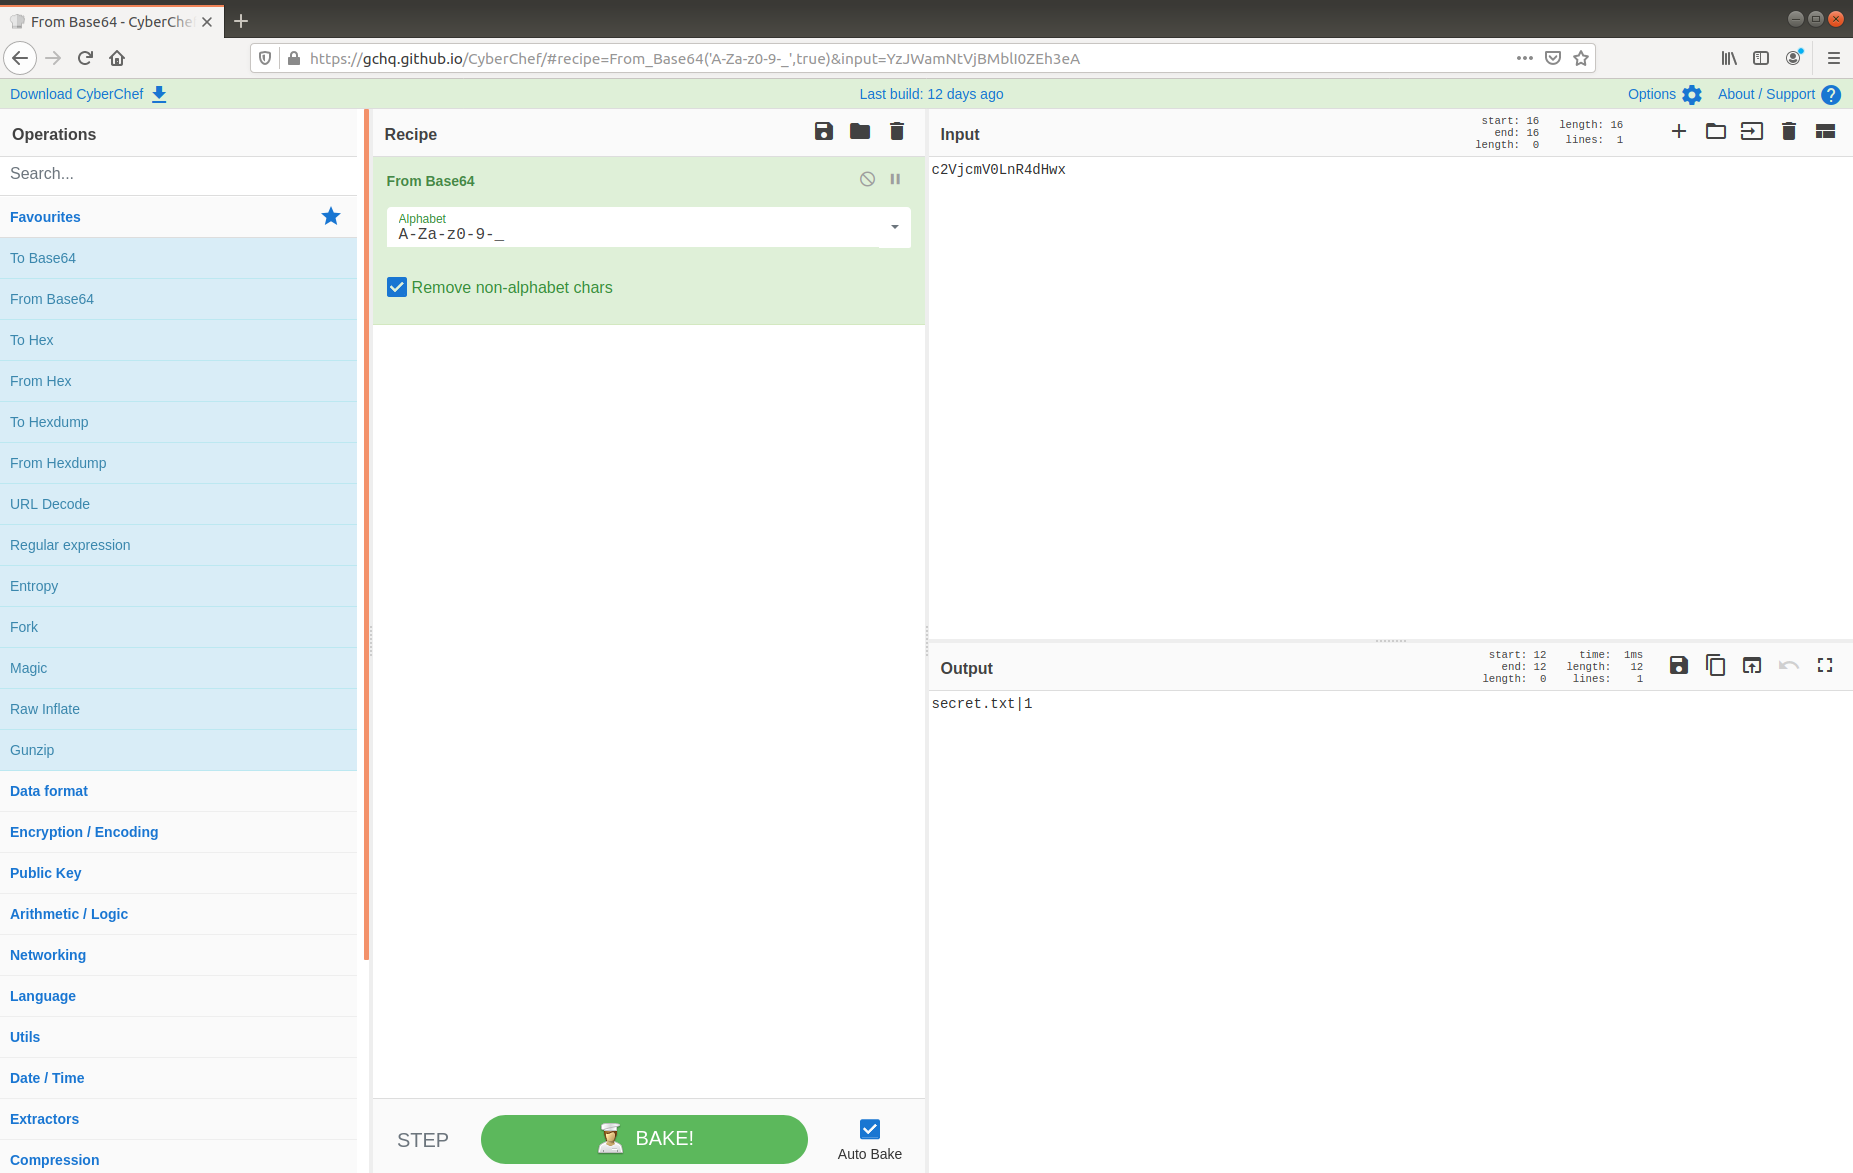
This looks promising! The first DNS request did in fact contain base64 (strictly speaking, base64url) data, which decoded to:
secret.txt|1
The second DNS request is for the following TXT record:
0.0ejXWsr6TH-P_1xkEstaVwi7WDy8AcxufnGotWXH3ckb2Lh5A-qFljIWOAOLUS0.T1W8P4CpiCZbCM7_QKcv-r0JG29RpsyYY5YkZRxo7YDIYUJpHlGgxu5PWV1G_DA.KNrmnrktfbeDgzcpPJBjPTeMYx3Qs1Q6bAuFhROWXemJ80gPTYIz0xl8usJQN3m.w.totallylegit.com
Again, after dropping the first, and trailing parts of the request we are left with the following base64url encoded string:
0ejXWsr6TH-P_1xkEstaVwi7WDy8AcxufnGotWXH3ckb2Lh5A-qFljIWOAOLUS0.T1W8P4CpiCZbCM7_QKcv-r0JG29RpsyYY5YkZRxo7YDIYUJpHlGgxu5PWV1G_DA.KNrmnrktfbeDgzcpPJBjPTeMYx3Qs1Q6bAuFhROWXemJ80gPTYIz0xl8usJQN3m
As before, decoding this in CyberChef with the URL Safe alphabet works, but the data appears to be corrupt…

…or encrypted. Thinking back to the first HTTP POST request in Packet 10, the form data might have been a hint.
Key: TryHarder
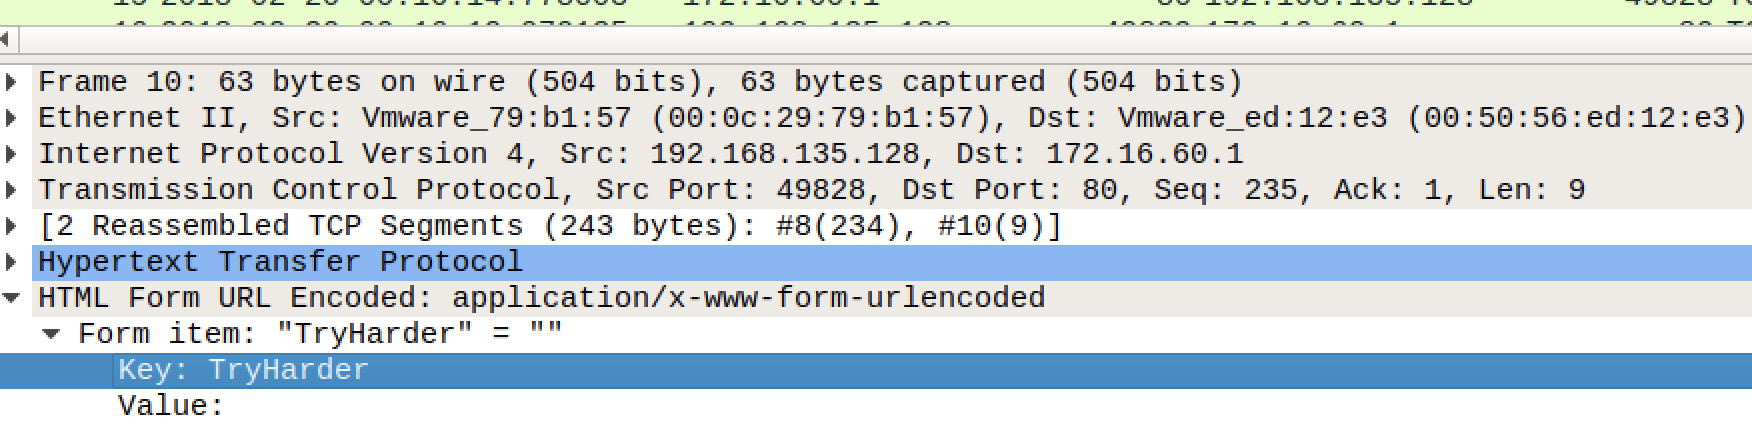
My first thought was to add an XOR operation to my CyberChef recipe, using TryHarder as the key, but no luck. Fortunately CyberChef makes it easy to try other ciphers, and not too long later I found that decrypting using RC4 with TryHarder as a key successfully produced a Zip archive containing a file named secret.txt – as per the first encoded DNS request.

Adding the Unzip operation to the CyberChef recipe gives us our flag, and the challenge is complete.

Flag
HTB{$n3aky_DN$_Tr1ck$}
Protected: Hack The Box – oBfsC4t10n (Forensics Challenge)
Protected: Hack The Box – Reminiscent (Forensics Challenge)
Hack The Box – Took the Byte (Forensics Challenge)
Someone took my bytes! Can you recover my password for me?
This time all we are given is a single file named password, which is identified simply as data.

Examining it in a hex editor doesn’t give many more clues.

I began thinking that the data might be encrypted somehow, and threw it into CyberChef.

Using the XOR Brute Force module with the default key length of 1 byte, I noticed that using 0xff as a key output a PK header associated with a ZIP archive which appeared to contain a file named password.txt. Quickly building a new recipe, I used the standard XOR module to decrypt the data using key 0xff, then used the Unzip module to extract and view the contents of password.txt which contains our flag.

Flag
HTB{27AjFDkqi1wJ}
Hack The Box – MarketDump (Forensics Challenge)
We have got informed that a hacker managed to get into our internal network after pivoting through the web platform that runs in public internet. He managed to bypass our small product stocks logging platform and then he got our costumer database file. We believe that only one of our costumers was targeted. Can you find out who the customer was?
This time all that is provided is a PCAP file; I started by opening it up in Wireshark…
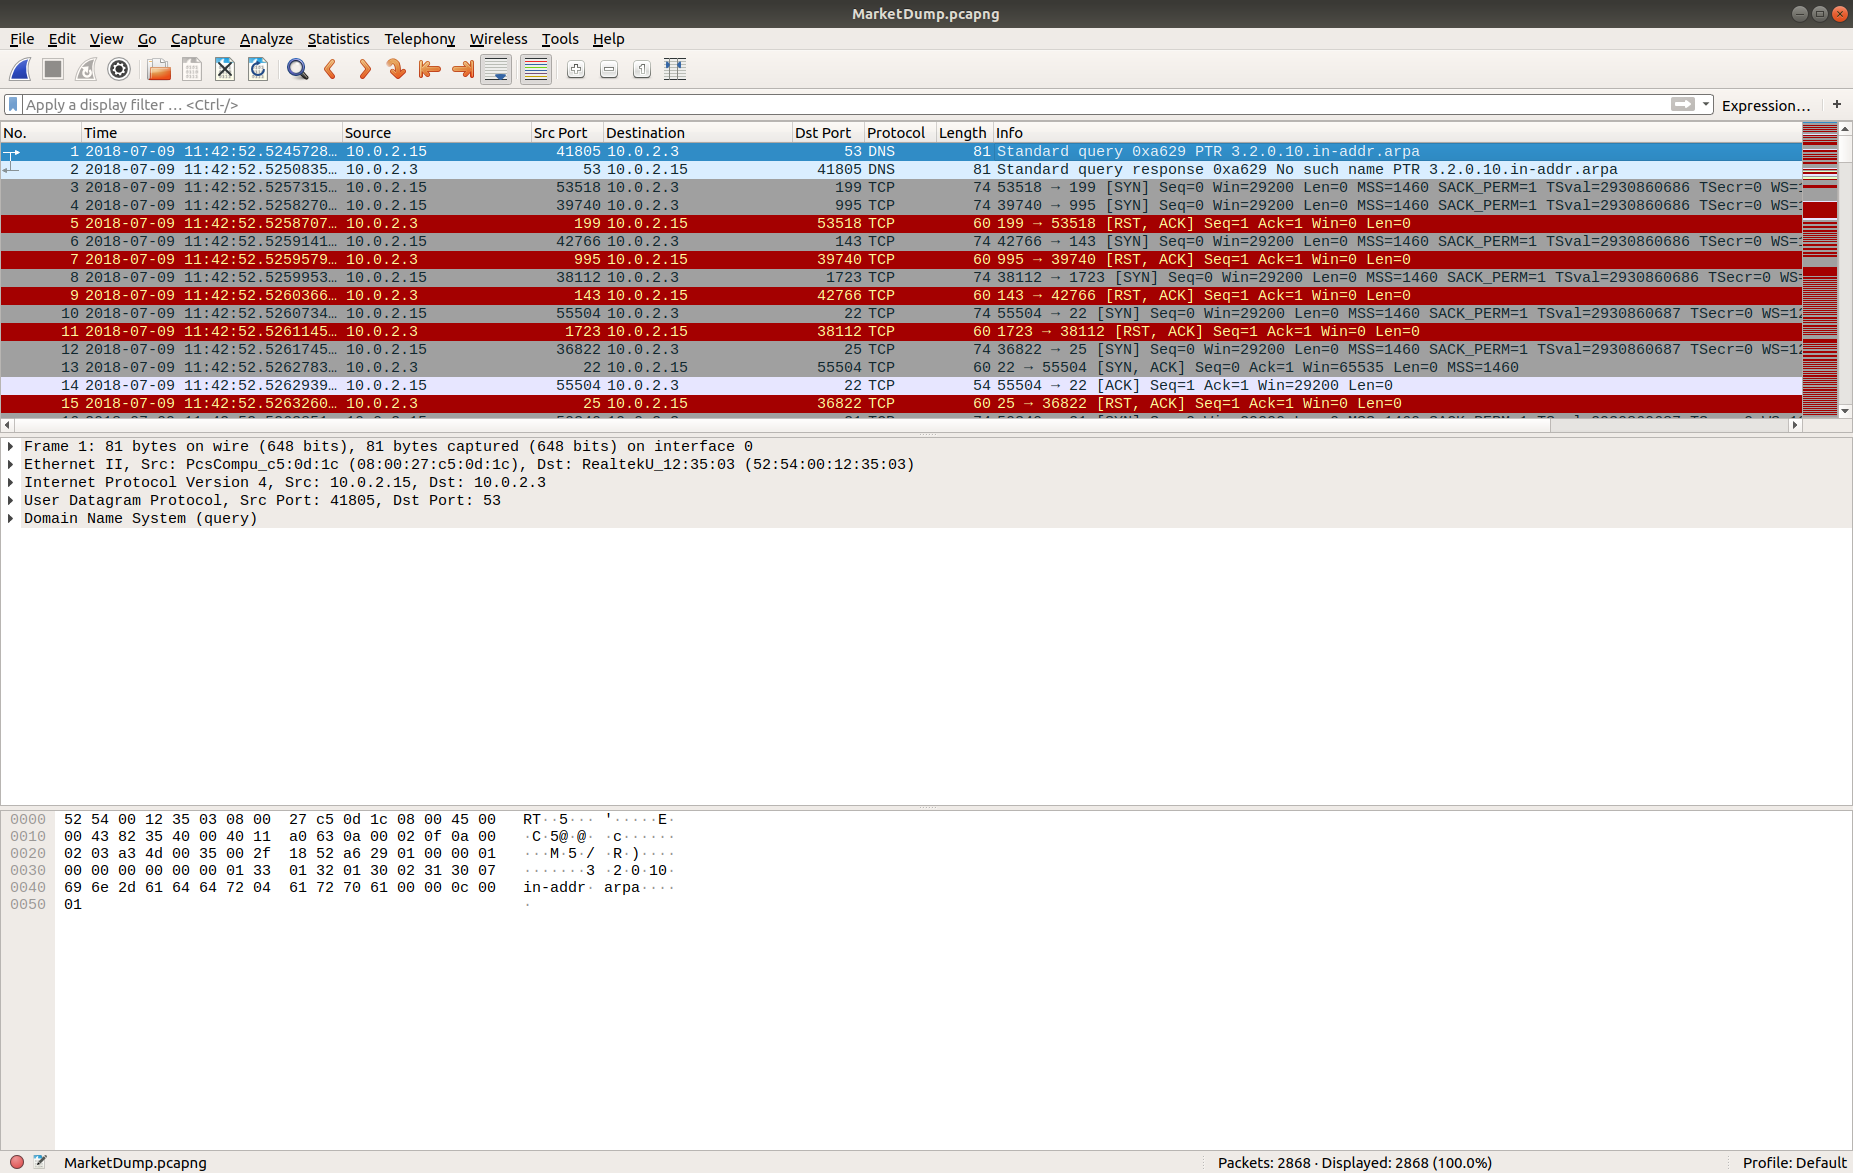
…and viewing the Protocol Hierarchy Statistics.

The statistics report that 38.7% of the TCP bytes are simply Data – that seems an interesting enough starting point. I used a simple Display Filter:
data
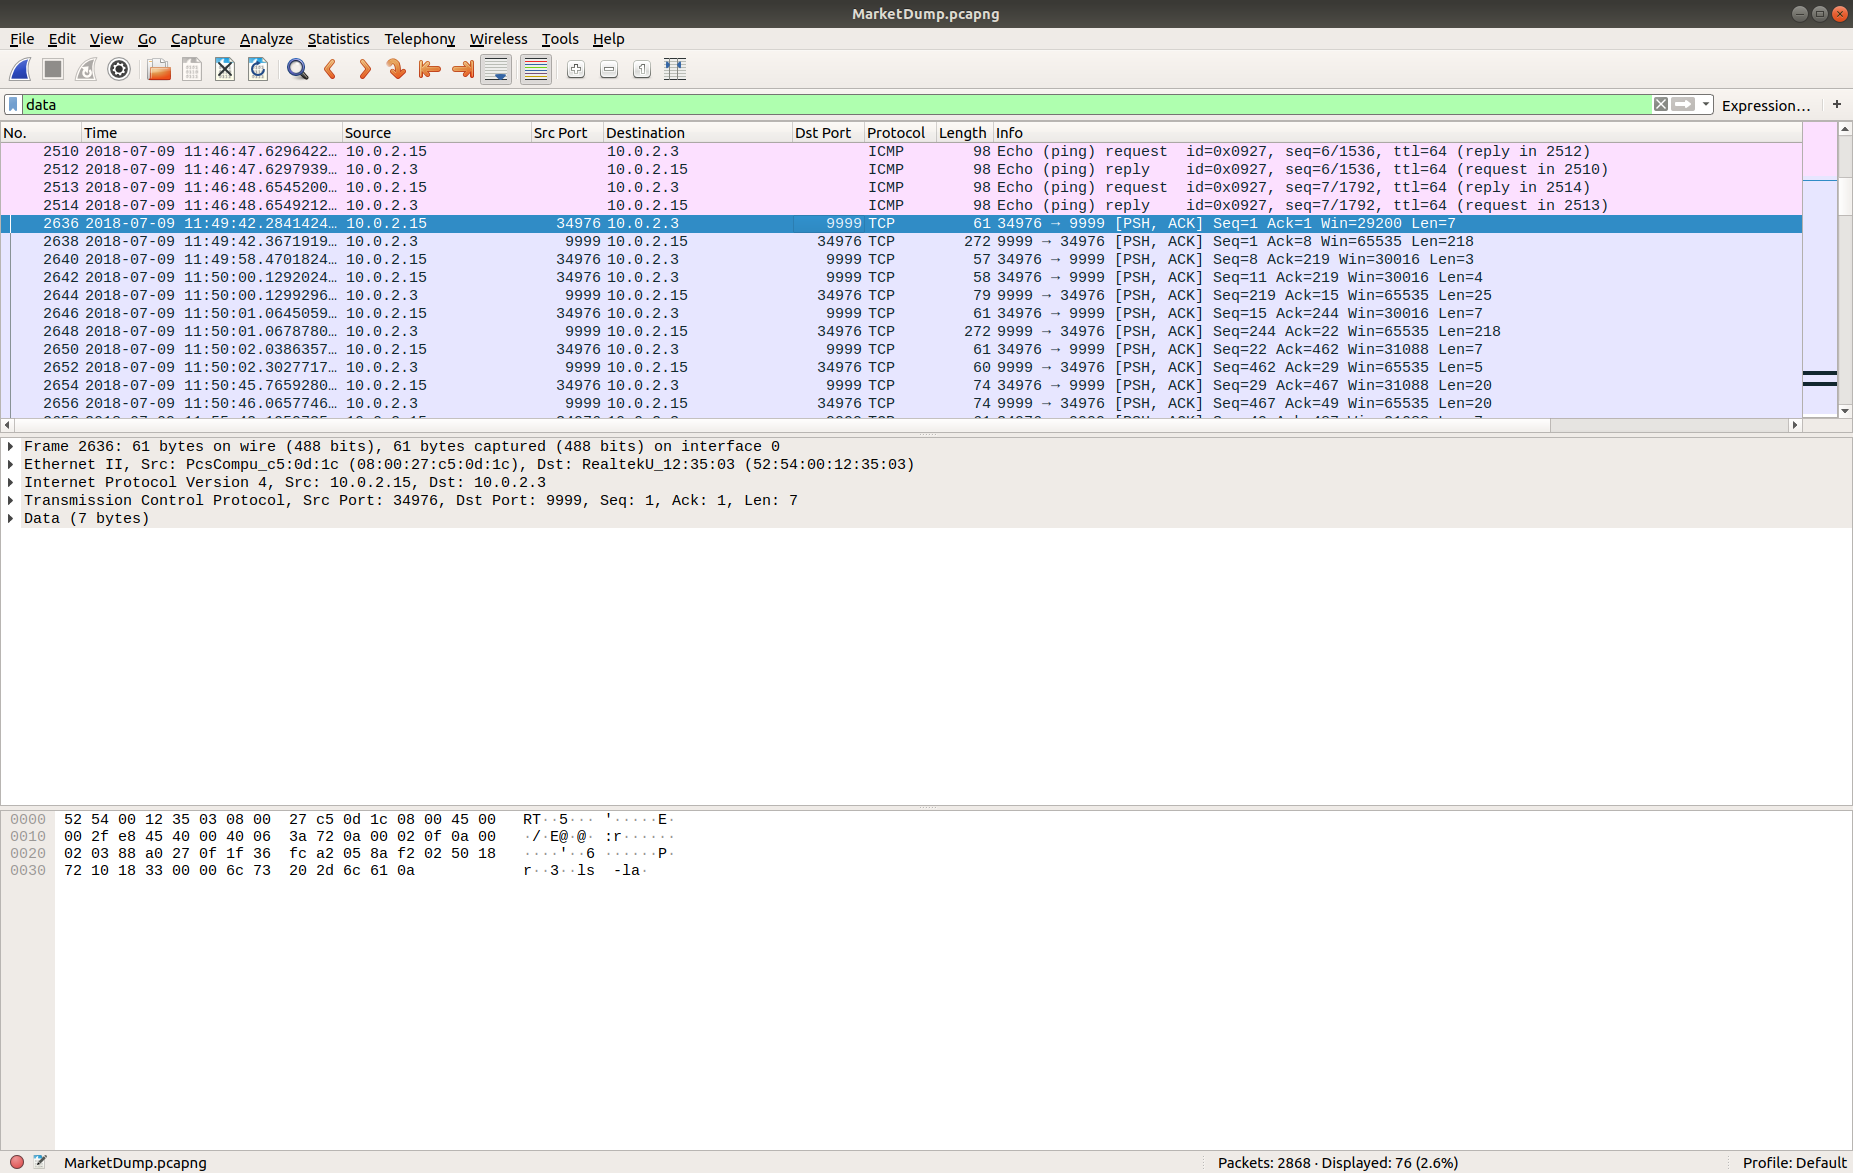
Then selected the first of the TCP packets (#2636) and Follow TCP Stream (TCP Stream #1056) to allow me to follow the session more easily.
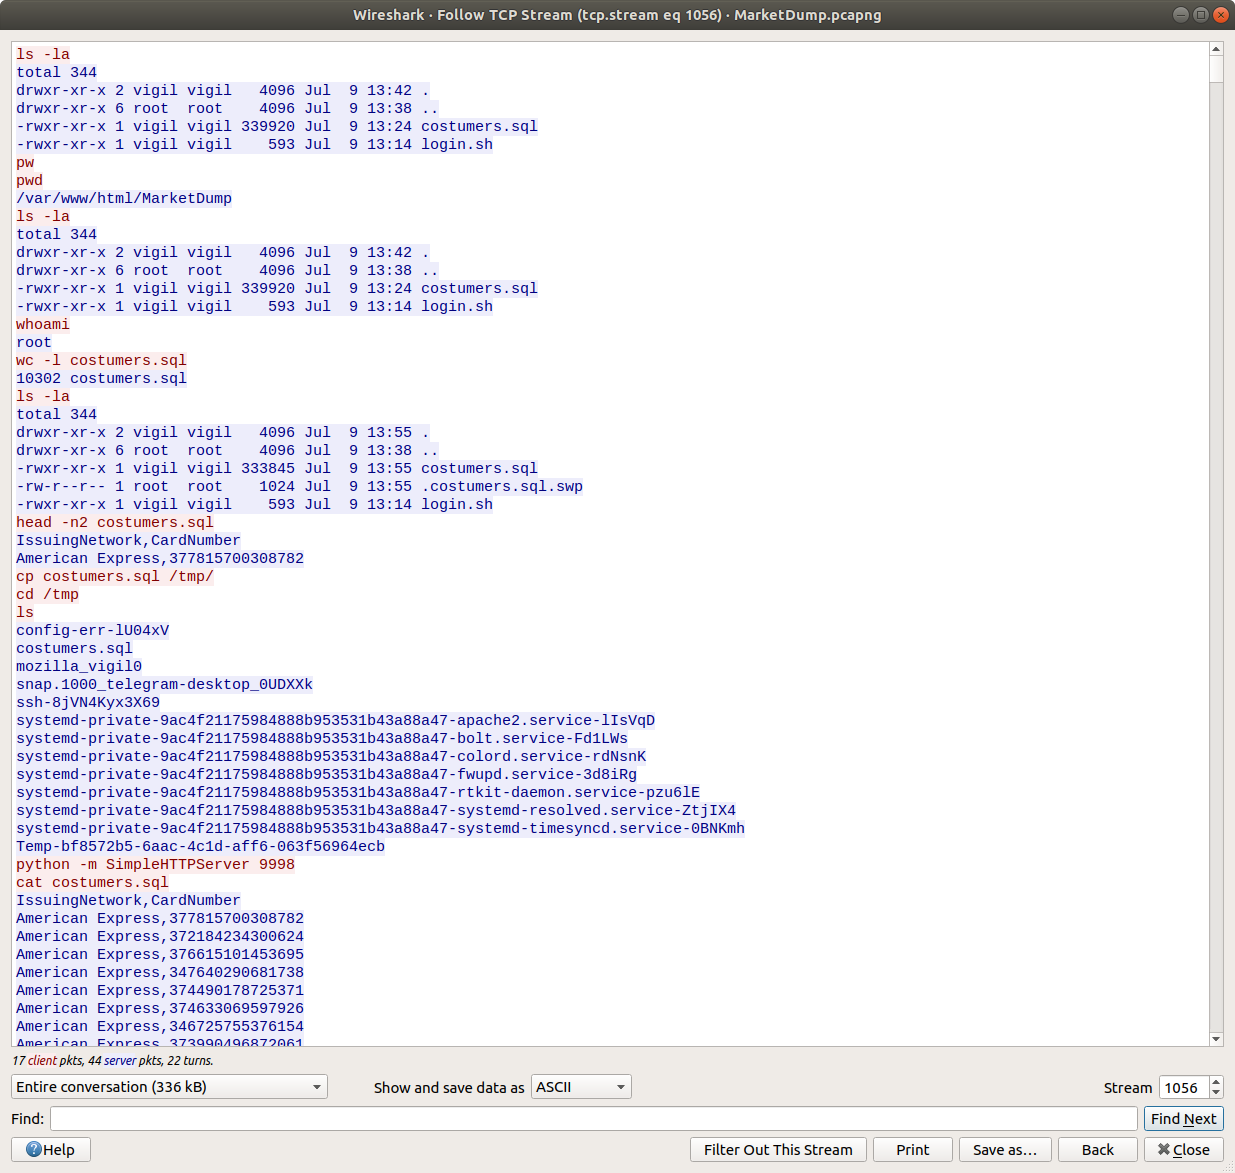
It looks like we have a capture of all the commands the attacker ran on the host post-compromise, including a dump of a text file – costumers.sql
cat costumers.sql
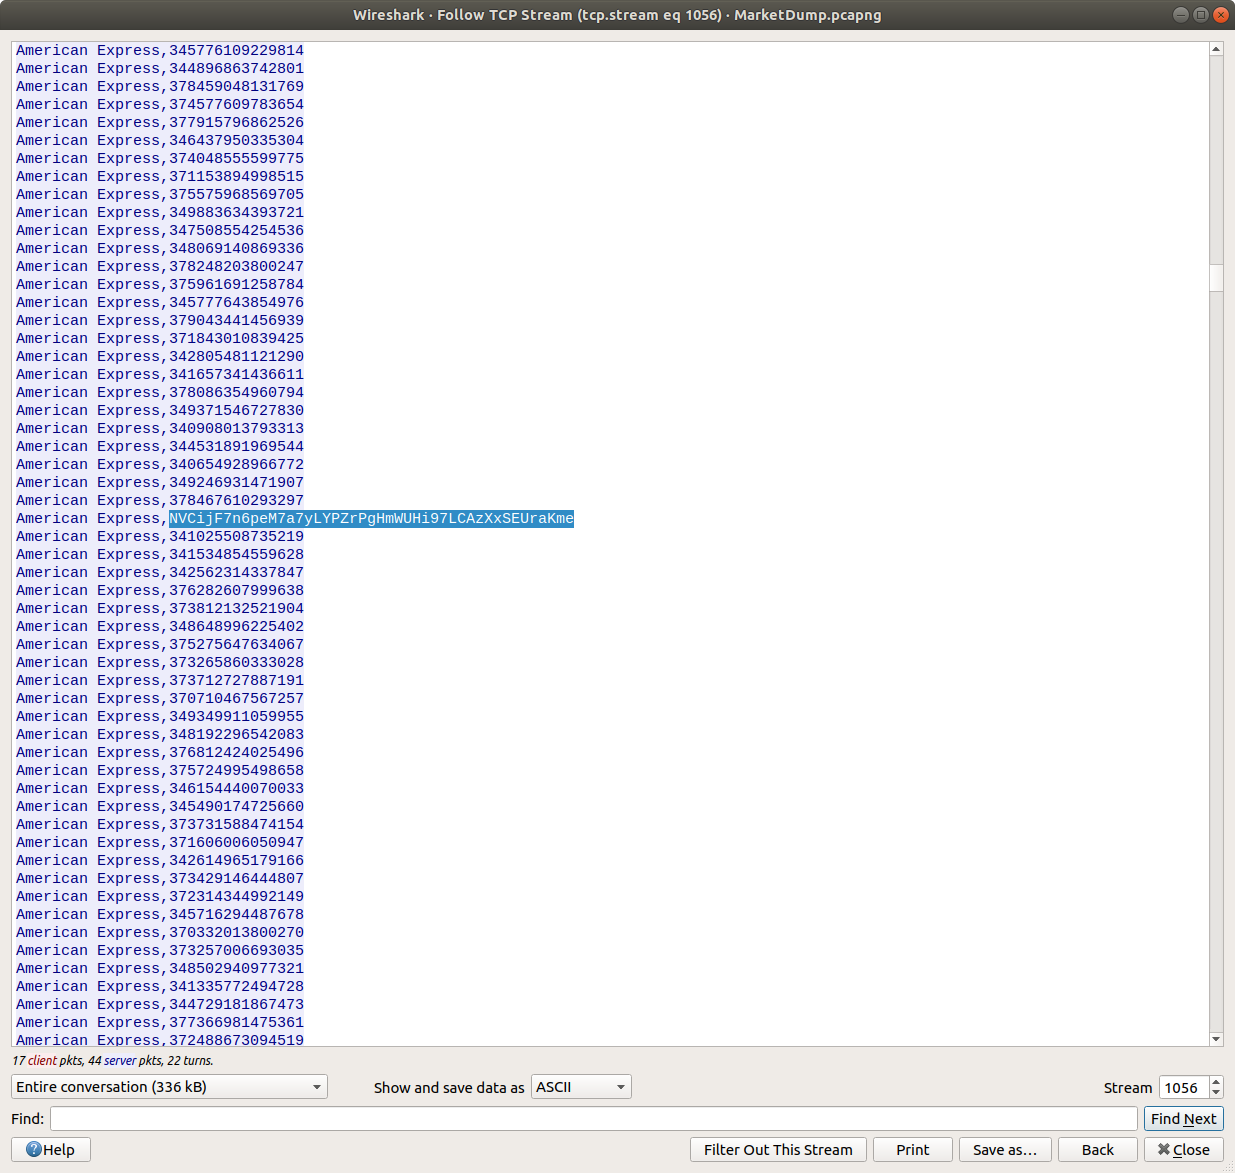
Scrolling through the dumped file it becomes apparent that one of the lines stands out.
American Express, NVCijF7n6peM7a7yLYPZrPgHmWUHi97LCAzXxSEUraKme
It kind of looks like base64, but the character set is not quite right. CyberChef should help make sense of this.

One of the really helpful things about CyberChef is that sometimes it just knows what the data is. The magic function suggests the data is actually base58 encoded…
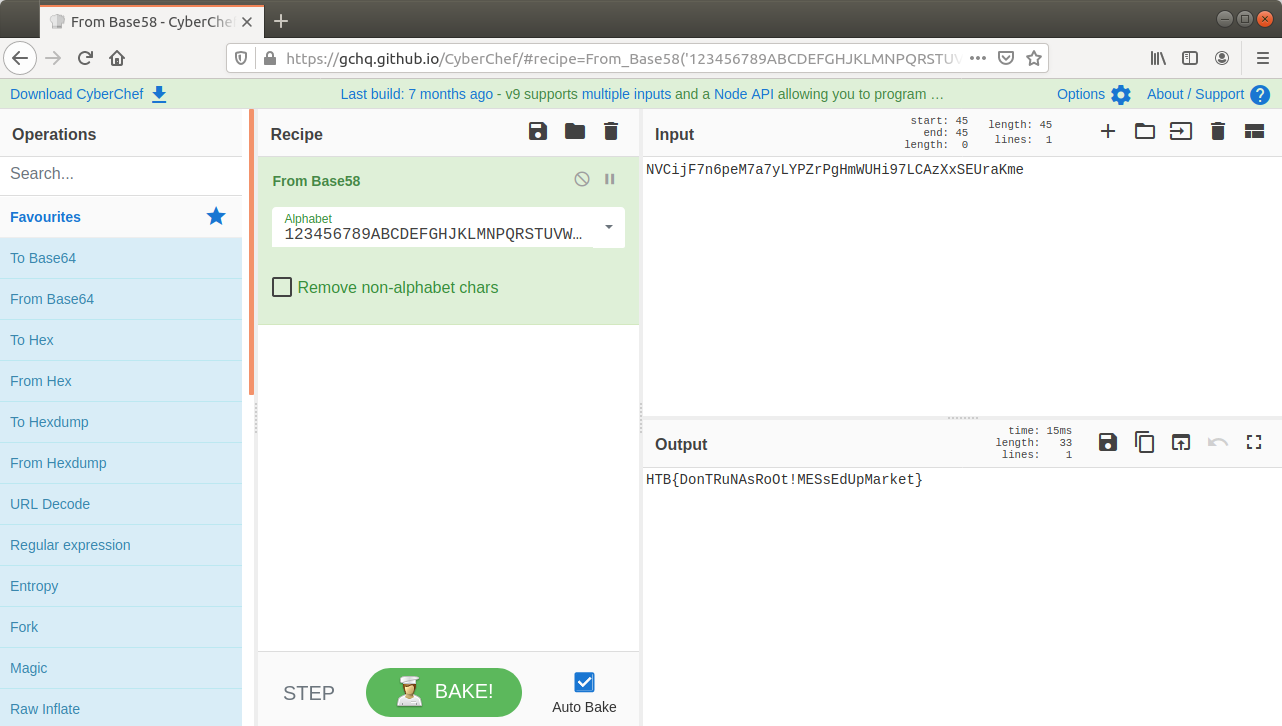
…and there we go. Flag retrieved and challenge solved!
Flag
HTB{DonTRuNAsRoOt!MESsEdUpMarket}
Protected: Hack The Box – Obscure (Forensics Challenge)
Crowdstrike AdversaryQuest CTF – The Proclamation
In January 2021 Crowdstrike opened up their AdversaryQuest CTF. The CTF consisted of 12 challenges split across three new “threat actors”: SPACE JACKAL, PROTECTIVE PENGUIN, and CATAPULT SPIDER. The challenges mostly focused on binary exploitation and reverse engineering which is a bit of a departure from my skillset. Nonetheless I was able to solve two of the twelve challenges; this one relating to the SPACE JACKAL adversary, and another from CATAPULT SPIDER.

Not to be confused with spaceflight enthusiasts, SPACE JACKAL have very strict opinions on source code indentation. Brought together by their unbounded hate for ASCII character 9, they will not rest until the last tab stop has been eradicated from the face of the Internet.
The Proclamation
A mysterious file appeared on a deep dark web forum. Can you figure out what we can’t see right now?
NOTE: Flags will be easily identifiable by following the format CS{some_secret_flag_text}. They must be submitted in full, including the CS{ and } parts.
We are given a 512 byte file proclamation.dat and left to get on with it. The first thing I did was use the file utility to determine what kind of data we are dealing with.
file proclamation.dat

The file is identified as a DOS/MBR boot sector. Interesting. Let’s see what strings gives us.
strings proclamation.dat > proclamation.dat.strings
cat proclamation.dat.strings

Ok. After a bit of digging on Google I was able to boot the file using the qemu emulation platform.
qemu-system-i386 proclamation.dat
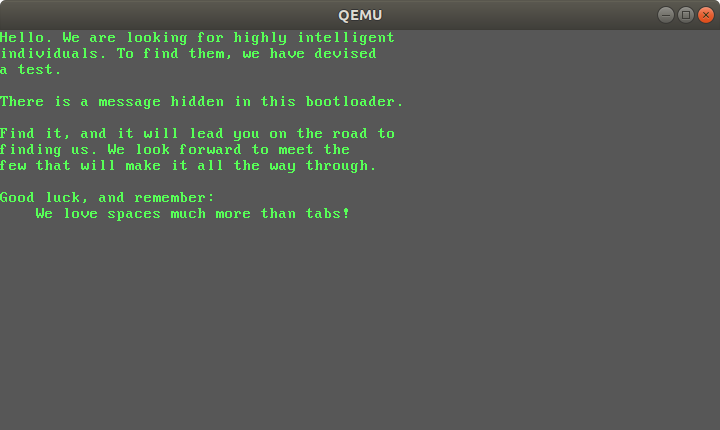
Cool! Now what? Examining the file in a hex editor showed what looked like random data; maybe it is encrypted somehow?

I wasn’t really sure how to proceed with this – encryption and reverse engineering aren’t my usual thing – but I do know CyberChef! I have an instance of CyberChef installed locally on my SIFT VM so I used that instead of the hosted instance, but the process is the same.
Assuming that the random data was actually encrypted, my first guess was to use the XOR Brute Force operation with a Key Length of 1, but that didn’t output anything intelligible. Next I tried increasing the Key Length to 2 and, in an attempt to cut down on the output, set the flag format – CS{ – as a crib.

CyberChef chewed on this for a minute or so then popped out eight potential decryptions. Examining the output for Key = eaea, I found the same text that was displayed when I used qemu to run the file, and then, appended to the end of the text, the flag!
Flag
CS{0rd3r_0f_0x20_b00tl0ad3r}
Magnet Weekly CTF – Week 9
The Magnet Forensics Weekly CTF has been running since October and sets one question each week using an image that changes each month. The October questions were based on an Android filesystem dump, and November’s related to a compromised Hadoop cluster built on Ubuntu Linux. The December challenges return to more familiar territory for me – Windows memory analysis!
These questions use the memory image from the Magnet Virtual Summit 2020, which I first examined during the MVS CTF earlier this year. You can find the rest of my Magnet Weekly CTF write-ups here.
The Week 9 question (all seven parts of it!) was written by Aaron Sparling, and begins with recovering the user’s notes on changing one of their passwords. Let’s go!
Part 1 (25 points)
The user had a conversation with themselves about changing their password. What was the password they were contemplating changing too. Provide the answer as a text string.
I like to use Volatility for memory analysis; version 2.6.1 was installed on my SIFT VM. As usual we begin by determining which profile is best to use with the image using the imageinfo plugin. I’m also piping the output to tee so that everything is written to a text file for reference later on.
vol.py -f memdump.mem imageinfo | tee /mnt/hgfs/Shared/mwctf/windows-memory/out/imageinfo.txt

The imageinfo plugin suggested the Win7SP1x64 profile, which seems sensible enough. The next plugin I like to run is pstree; this will show most of the processes that were running when the memory was captured, giving us an idea of what was happening on the host.
vol.py -f memdump.mem pstree | tee /mnt/hgfs/Shared/mwctf/windows-memory/out/pstree.txt
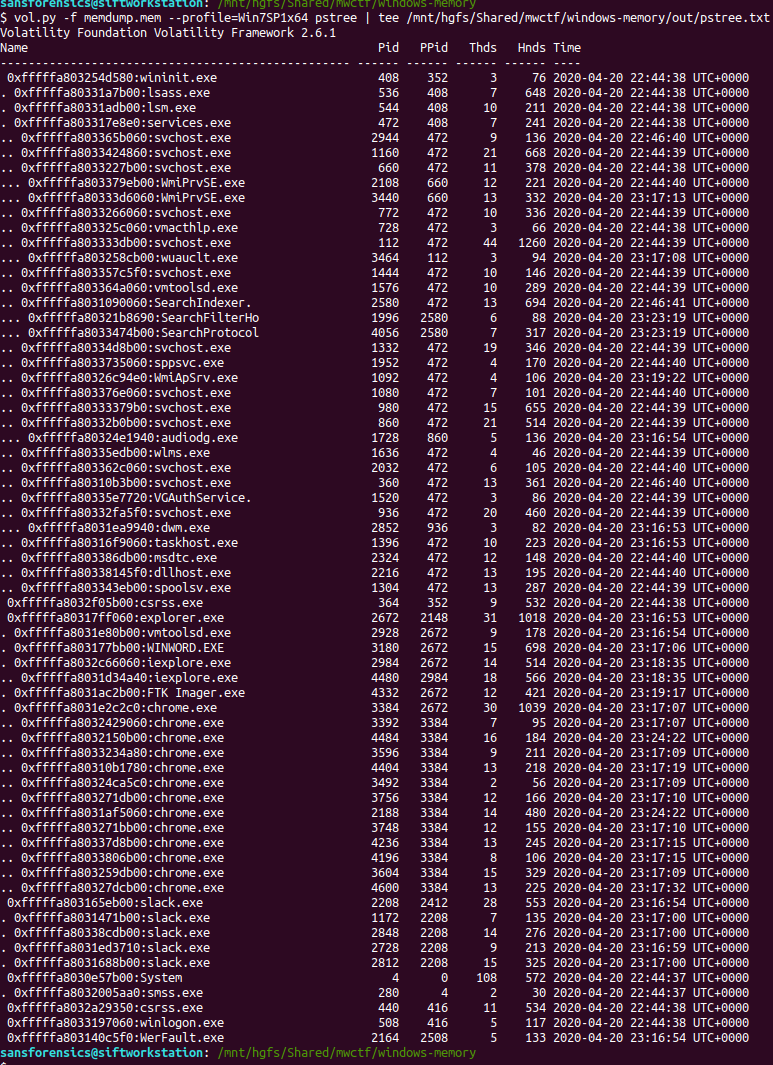
The question references the user having a conversation so I started off by dumping the memory from the Slack processes and examining the output of strings, but I didn’t find anything useful. Next, I looked at the WINWORD.EXE (PID: 3180) process. Perhaps the user wrote their conversation into a file? I started with the cmdline plugin in the hope that Word was opened with a file path in the command line.
vol.py -f memdump.mem --profile=Win7SP1x64 cmdline -p 3180 | tee /mnt/hgfs/Shared/mwctf/windows-memory/out/cmdline-3180.txt

Unfortunately not, but there are other ways of determining which files a process was using. The handles plugin, with a filters on the process and handle types will output a list of all of the files in use by the Word process.
vol.py -f memdump.mem --profile=Win7SP1x64 handles -p 3180 -t File | tee /mnt/hgfs/Shared/mwctf/windows-memory/out/handles-3180-file.txt
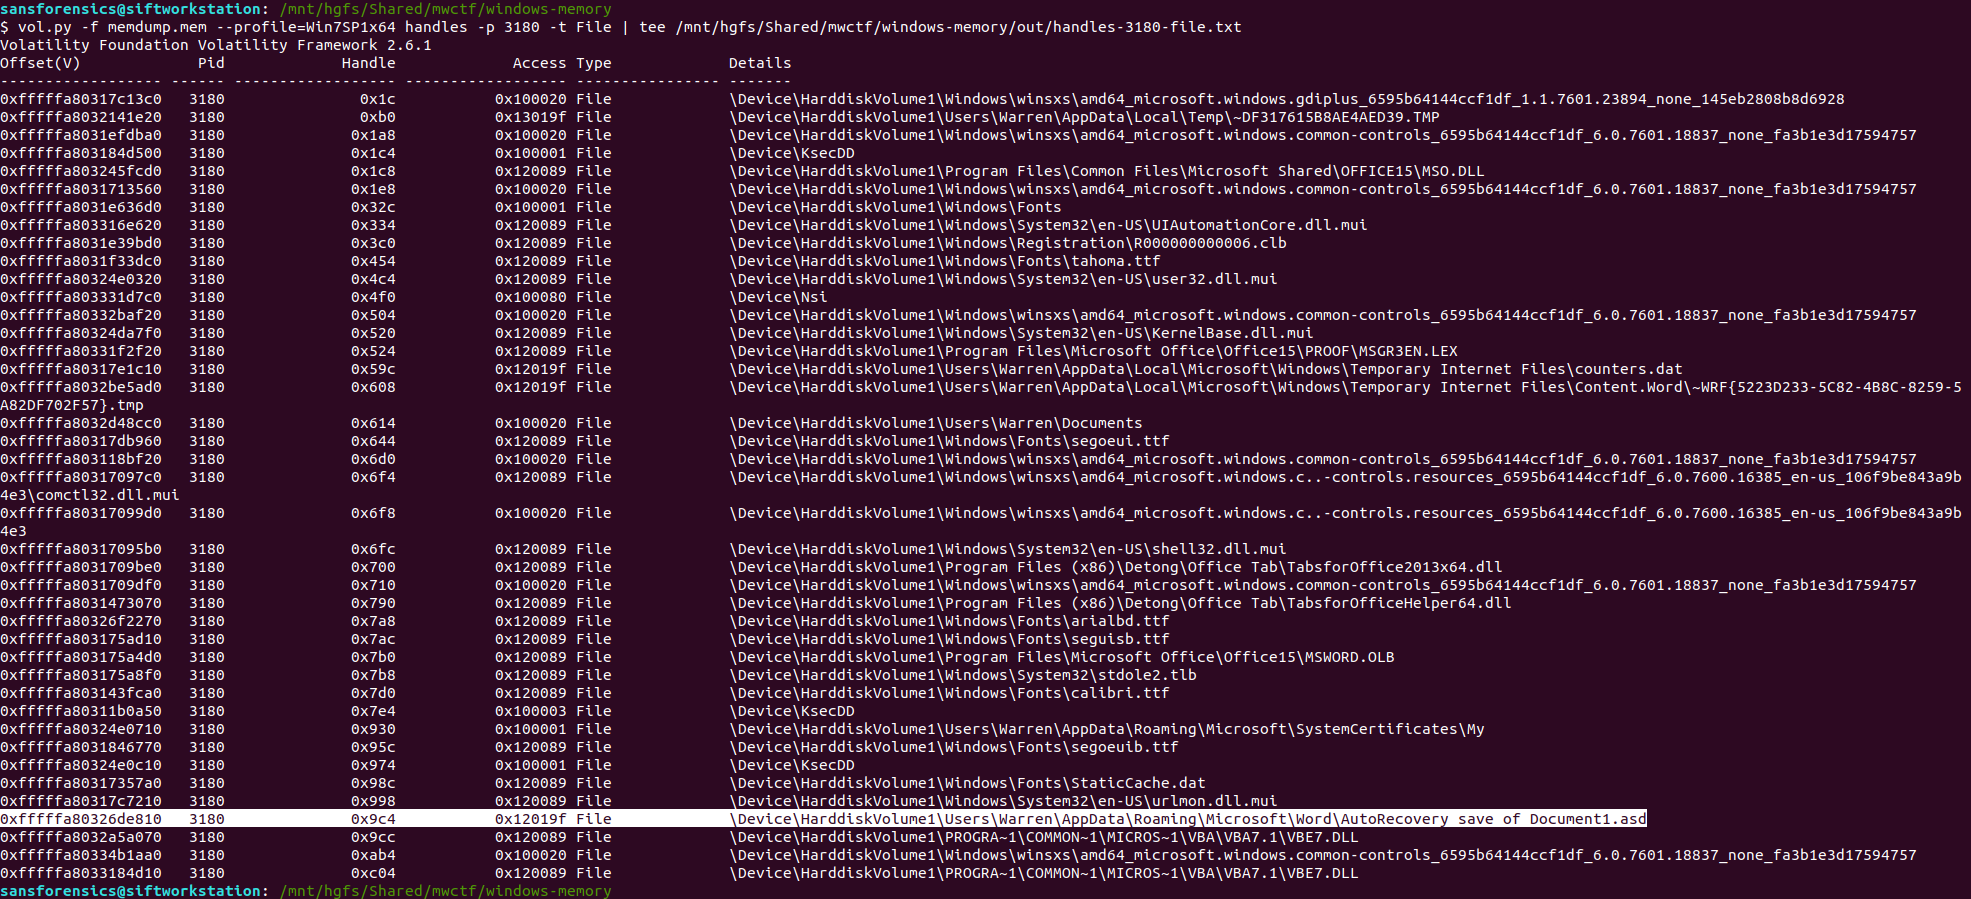
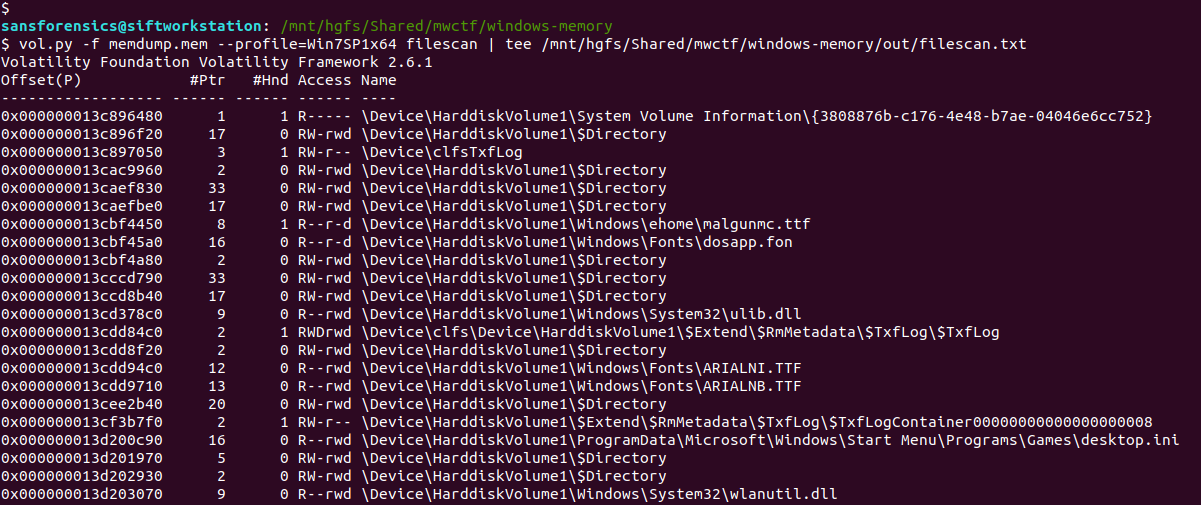
One file stood out – AutoRecovery save of Document1.asd – from user Warren’s profile. This file might not exist on disk anymore, but we can probably extract it from the memory dump. The first step is to run the filescan command, saving the output to a file for use later.
vol.py -f memdump.mem --profile=Win7SP1x64 filescan | tee /mnt/hgfs/Shared/mwctf/windows-memory/out/filescan.txt
Next I used grep to locate the physical offset of the file, then ran the dumpfiles Volatility plugin to extract the file from the memory image.
grep "AutoRecovery save of Document1.asd" out/filescan.txt
vol.py -f memdump.mem --profile=Win7SP1x64 dumpfiles -Q 0x000000013e6de810 -D. -n

Opening the extracted file with LibreOffice, we can see the user’s conversation with themselves, and their proposed new password.

Flag (Part 1)
wow_this_is_an_uncrackable_password
Part 2 (15 points)
What is the md5 hash of the file which you recovered the password from?
This part is easy enough. We have already extracted the auto-recovery document so all we need to do is calculate the MD5 hash.
md5sum file.None.0xfffffa803316f710.AutoRecovery\ save\ of\ Document1.asd.dat

Flag (Part 2)
af1c3038dca8c7387e47226b88ea6e23
Part 3 (15 points)
What is the birth object ID for the file which contained the password?
On a NTFS filesystem, every entry in the Master File Table (MFT) contains a number of GUIDs which make up the $OBJECT_ID attribute. While the Object ID might change over the life of the file, the Birth Object ID is a record of the first Object ID assigned and should never change.
We can extract the MFT as it existed at the time of the memory capture using Volatility’s mftparser plugin. You will almost always want to redirect the output of mftparser to a file and, as per the warning, the parser can take a while (although more likely minutes than hours!) The other warnings during the extraction don’t appear to have had any ill effect on the rest of the analysis.
vol.py -f memdump.mem --profile=Win7SP1x64 mftparser --output-file=out/mftparser.txt

Once mftparser has completed we can search for the MFT entry related to the AutoRecovery file using grep; the -B 20 and -A 11 options print the 20 lines before the matching line, and 11 lines after, just to keep the output tidy.
grep -B 20 -A 11 "AutoRecovery save of Document1.asd" out/mftparser.txt
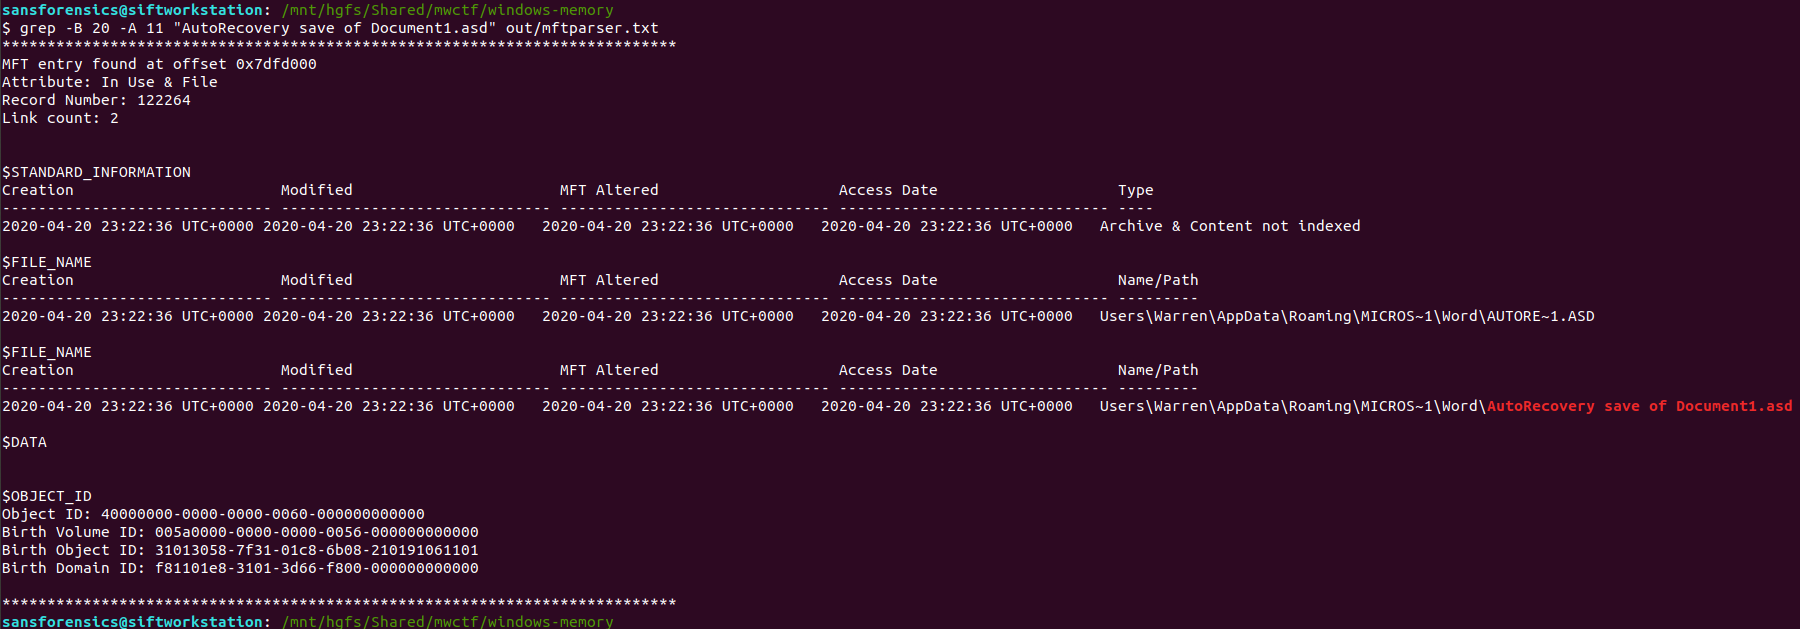
The $OBJECT_ID attribute is printed at the bottom of the entry, including the Birth Object ID value.
Flag (Part 3)
31013058-7f31-01c8-6b08-210191061101
Part 4 (20 points)
What is the name of the user and their unique identifier which you can attribute the creation of the file document to?
Format: #### (Name)
We know that the AutoRecovery document was stored in the profile for user Warren. We could dig into the registry to link each ProfileImagePath to its SID and RID values, but a big part of memory analysis is quick wins and I know that the hashdump plugin will print the username, RID, and NTLM hash for each local account on the box. Based on the format hint in the question, the RID and username are all we need for now.
vol.py -f memdump.mem --profile=Win7SP1x64 hashdump | tee /mnt/hgfs/Shared/mwctf/windows-memory/out/hashdump.txt

There we go – user account Warren has RID 1000. Not too surprising as this is the only user account other than the built-in Administrator and Guest accounts, but now we have confirmed it. The NTLM hash isn’t really of any use to us at the moment, but credentials and hashes are always nice to have around.
Flag (Part 4)
1000 (Warren)
Part 5 (25 points)
What is the version of software used to create the file containing the password?
Format ## (Whole version number, don’t worry about decimals)
Ok now we have to dig into the registry! Volatility has a printkey plugin that is smart enough to query each registry hive it finds and print all of the results, but we can be more targeted by specifying which registry hive we are interested in first. The hivelist plugin displays the virtual and physical offsets for each of the hives it is able to find. Again, this will likely be useful later on so write the output to a file.
vol.py -f memdump.mem --profile=Win7SP1x64 hivelist | tee /mnt/hgfs/Shared/mwctf/windows-memory/out/hivelist.txt

I looked in the ntuser.dat hive associated the Warren user account. This hive contains, among other useful things, data about software installed by the user. Now we have the offset for the hive, we can run the printkey plugin and pull the data relating to the Microsoft Office installation.
vol.py -f memdump.mem --profile=Win7SP1x64 printkey -o 0xfffff8a003ebd010 -K "SOFTWARE\Microsoft\Office"
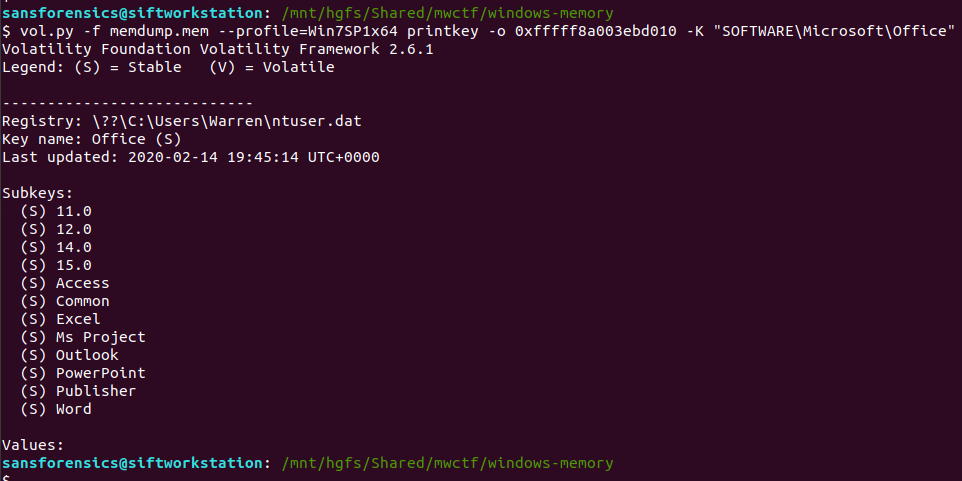
Now, I wasn’t completely sure of the answer at this point. The Subkeys 11.0, 12.0, 14.0, and 15.0 all relate to Office versions, but which one is correct? After a bit more digging I found another registry key, this time in the HKLM\Software hive, that confirmed which version was correct.
vol.py -f memdump.mem --profile=Win7SP1x64 printkey -o 0xfffff8a0002c9010 -K "Classes\Word.application\curVer"

Version 15 corresponds to Microsoft Office 2003, but thanks to the format hint we know that 15 is enough.
Flag (Part 5)
15
Part 6 (20 points)
What is the virtual memory address offset where the password string is located in the memory image?
Format: 0x########
This part caused me the most trouble. I knew how to easily find the physical offset using the strings utility and grep, but how to find the virtual offset? I recalled that Volatility has its own strings plugin, and after reading some Volatility documentation, I was able to link the physical offset to the virtual one.
Rather than outputting every string in the image, the Volatility strings plugin takes a specially formatted list of physical offsets and strings as an input, displaying the matching virtual offsets. Cool. First thing is to build the input list in the following format:
<physical offset (decimal)>:<string>
After some trial and error involving sed, awk, and cut I gave up and used the Windows Sysinternals strings64.exe utility (as suggested by the Volatility documentation!) which creates this form of output by default. Dropping back to my Windows 7 host, I dumped the strings64.exe output to my shared directory:
>strings64.exe -o memdump.mem > out/strings-physical-dec.txt

Back to SIFT and we can see that we have the required format: physical offsets in decimal representation, and the associated strings, colon-separated.
We are only really interested in the strings matching the password from Part 1, so we filter these using grep, writing the result to a file – this will be the input for the Volatility strings plugin.
head out/strings-physical-dec.txt
grep "wow_this_is_an_uncrackable_password" out/strings-physical-dec.txt | tee out/strings-physical-dec-flag1.txt

Now that the input file is formatted correctly we can throw Volatility’s own strings plugin at the image.
vol.py -f memdump.mem --profile=Win7SP1x64 strings -s out/strings-physical-dec-flag1.txt | tee out/volstrings-flag1.txt
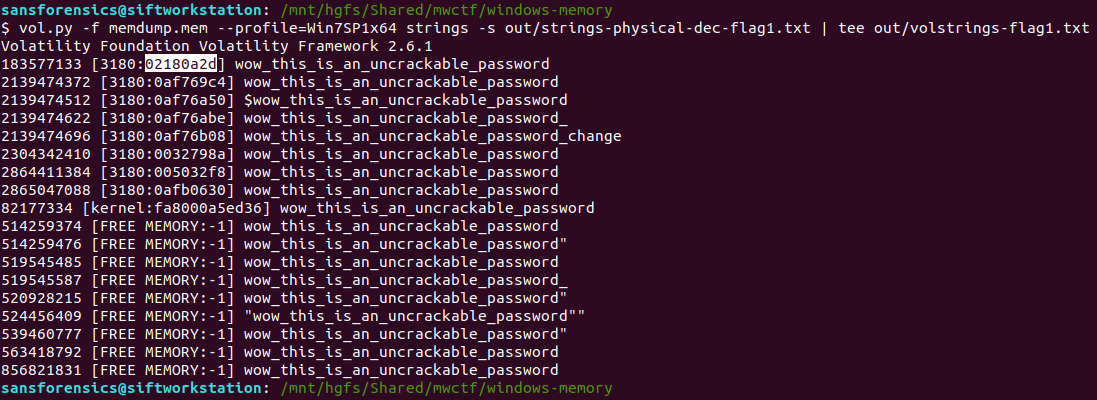
The output format is as follows:
<physical offset (decimal)> [<pid>:<virtual offset (hex)>] <string>
I wasn’t sure which of the resulting virtual offsets was the correct one so tried the first match, which was accepted.
Flag (Part 6)
0x02180a2d
Part 7 (20 points)
What is the physical memory address offset where the password string is located in the memory image?
Format: 0x########
Ok, this one was much easier. We already have the physical offset, only it is represented in decimal and the format hint specifies a hex representation. No problem though, CyberChef can fix that easily!

There we go. Solved. But just to make sure I also ran strings over the memory image from within my SIFT VM with the -t x flag to specify that offsets should be printed as hex rather than decimal. Searching for the password with grep returns a single hit, matching nicely with the value from CyberChef.
strings -t x memdump.mem > out/strings-physical-hex.txt
grep "wow_this_is_an_uncrackable_password" out/strings-physical-hex.txt

Flag (Part 7)
0xaf12a2d
Memlabs Memory Forensics Challenges – Lab 5 Write-up

Memlabs is a set of six CTF-style memory forensics challenges released in January 2020 by @_abhiramkumar and Team bi0s. I have been working on the Magnet Weekly CTF recently so the other write-ups I had in progress have been sitting partially finished for a while now. This write-up covers Lab 5 – Black Tuesday, which I worked on back in July! You can find the rest of my Memlabs write-up here.

MD5: 9dd6cb1134c9b018020bad44f27394db
SHA1: 289ec571ca6000b6234dee20c28d4cdba13e4ab7
After downloading the memory image and calculating the hashes, the first thing to do is determine which profile Volatility should use for the rest of the analysis.
vol.py -f MemoryDump_Lab5.raw imageinfo

The imageinfo plugin suggests a few profiles we can use; let’s go with Win7SP1x64 for now, and check the running processes with pstree.
vol.py -f MemoryDump_Lab5.raw --profile=Win7SP1x64 pstree
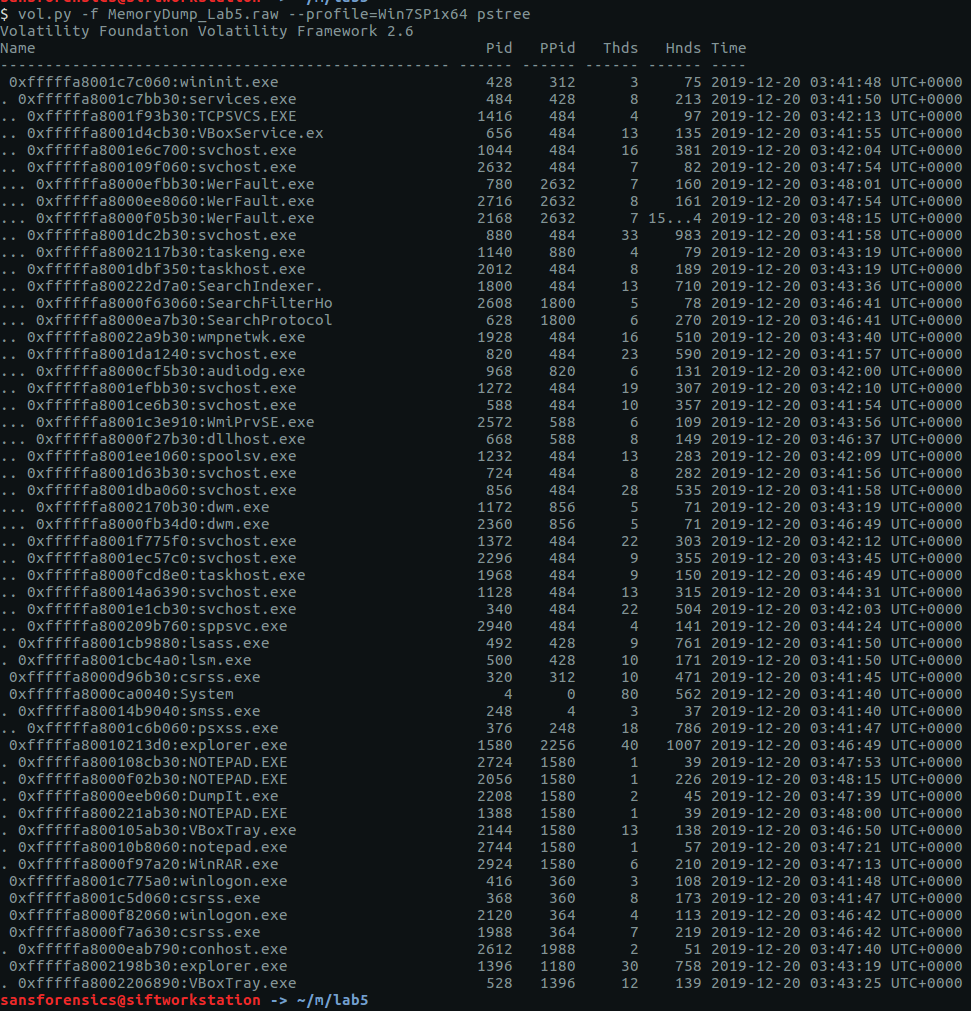
There are a few user processes that warrant investigation but no immediately obvious starting point. The cmdline plugin will display any command-line arguments that were passed when the process was started. Initially I ran the cmdline plugin with no additional arguments, but I have truncated the output to focus on two of the more interesting processes – WinRAR.exe and NOTEPAD.EXE.
vol.py -f MemoryDump_Lab5.raw --profile=Win7SP1x64 cmdline -p 2924,2724

We can see that the WinRAR process has a file associated with it; using the filescan and dumpfiles plugins we can extract this file from the memory image.
vol.py -f MemoryDump_Lab5.raw --profile=Win7SP1x64 filescan > filescan.txt
grep -E 'SW1wb3J0YW50.rar

Now we have the RAR file…
unrar e SW1wb3J0YW50.rar

…but we don’t have the password to open it. The RAR file contains Stage2.png, let’s go find the Stage 1 password.
After going down a few dead ends, I tried the screenshot plugin which, as the name suggests, allows us to see what was displayed on the desktop at the time the memory dump was taken. The screenshots are actually wire-frame drawings showing the positions and titles of the displayed windows. It won’t show us the full window content, but it is often enough to get an idea of what was displayed on the desktop.
vol.py -f MemoryDump_Lab5.raw --profile=Win7SP1x64 screenshot -D screenshot-output/

The screenshot plugin outputs a number of images; most are empty but one (session_1.WinSta0.Default.png) shows us that the Windows Photo Viewer was displaying a file with what looks to be a base64 filename:

ZmxhZ3shIV93M0xMX2QwbjNfU3Q0ZzMtMV8wZl9MNEJfM19EMG4zXyEhfQ
We can decode the base64 with CyberChef…

…and there’s our Stage 1 flag:
flag{!!_w3LL_d0n3_St4g3-1_0f_L4B_5_D0n3_!!}
Now, we can go back to the RAR file and extract the Stage2.png:

Success!
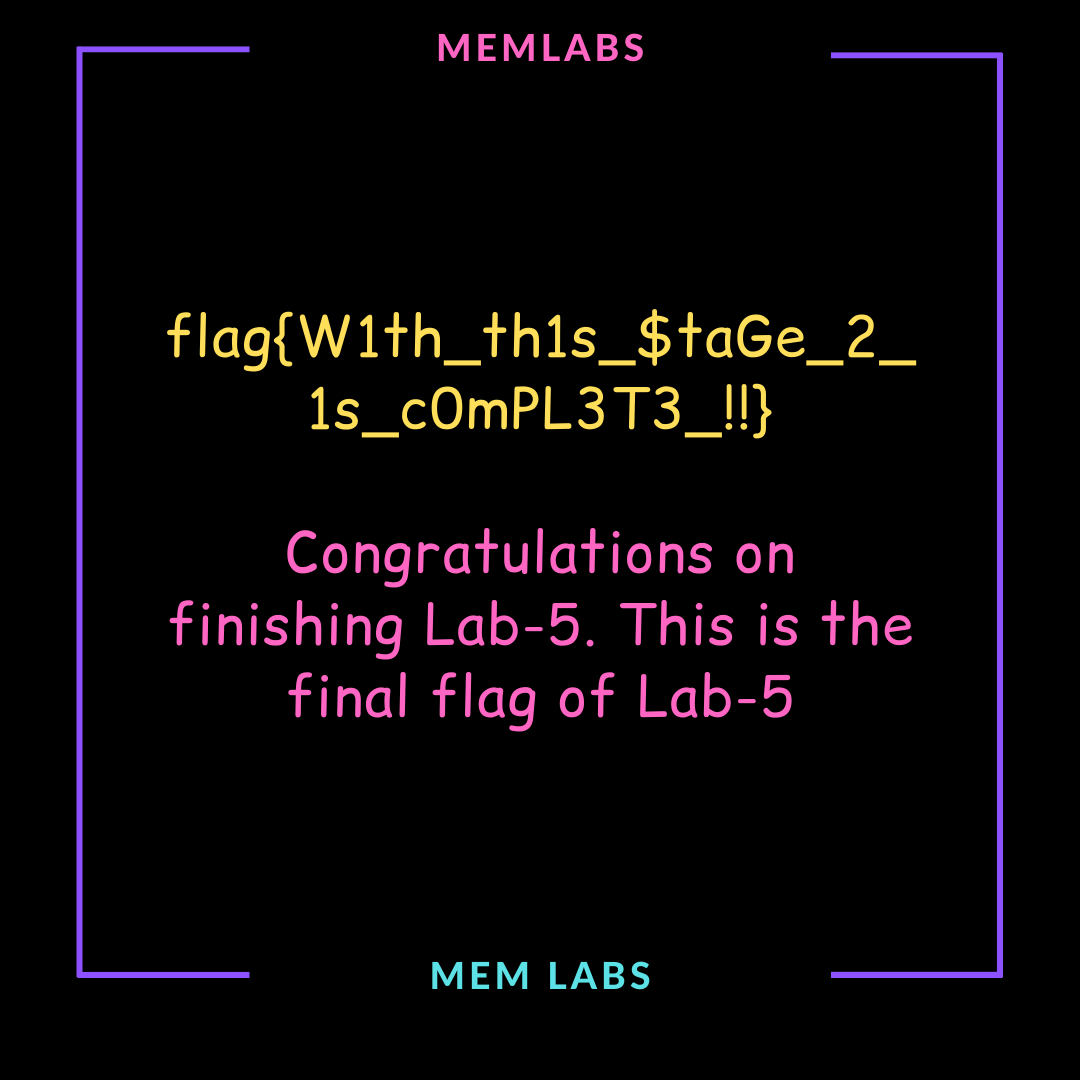
flag{W1th_th1s_$taGe_2_1s_c0mPL3T3_!!}
Between “completing” this lab in the middle of July 2020 and finding time to write it up (in November!), the challenge description has been updated with the following note:
This challenge is composed of 3 flags. If you think 2nd flag is the end, it isn’t!! 😛
What?

This kind of thing was exactly what put me off the Memlabs challenges in the first place. Maybe the NOTEPAD.EXE process (PID: 2724) is worth examining, but I’m moving on.
